A Bad News / Good News Kind of Day

20180605_2245111876041099.jpg

Saturday morning, we had a major storm roll through our city at about 5:30 in the morning. I start this with that tidbit, even though I’m told that is incidental to my problem. The storm brought intense lightning, high winds and torrential rain. Thousands in our area lost power for several hours or more. We were fine though, other than some potted plants that blew over and a hammock that briefly became a sail, but didn’t cause damage.

Fast forward to noon and the bad news. My daily-use computer, a sleek, fast Asus laptop with Windows 10, starts to act squirrely. When all else fails, reboot, right? I rebooted and it’s been dead since. Endless “Starting Windows Repair”, followed by “Diagnosing PC” loop. The net is full of sad stories about this. Computer death by boot corruption.

Time to get a recovery disk and force start the computer. Oddly, I could not find my discs and had to make one from another Windows 10 computer.

My craft room laptop is an old brick of a Dell computer that is also Windows 10. It runs my embroidery machine and Cricut. I found a flash drive, went downstairs to the basement and commenced to creating a recovery drive.

Oops, freeze.

Reboot.

Uh-oh.

The Dell did the same thing. Stuck in a loop. Dead.

WTF? Really?

My very rusty troubleshooting hat reluctantly had to come out.

After some research and experimentation, I finally got to a blue screen of recovery and troubleshooting options on the Asus. Sadly, none of the options worked, including a Reset option, but I could get to a command prompt to try some Internet fixes, still to no avail.

With both computers dead, I was stuck. Somewhere in all of this, the Dell arrived at the same recovery/troubleshooting screen as the Asus. Not holding much hope, I tried Reset, which failed on the Asus, and to my shock, it worked on the Dell. An operational, albeit somewhat old and feeble computer. One down, one to resurrect.

My son brought over his laptop and finally, after two days, I was able to make a recovery thumb drive, whereupon I learned that a recovery disc is NOT the same as a startup disc. When I figured that out, then I had to run to Target to buy blank DV-R to make a startup disc.

Side note, apparently DV-R is so old the kids have no idea what you are asking for. The baby clerk stared at me dumb founded, shook his head like I was asking for a stone ax, then helpfully referred me to Best Buy. Turns out Target does carry blank CD-R and DV-R media, and I found them myself.

None of my recovery efforts helped, although I did find my data, intact. A call to official Asus support later and it was determined my operating system was fully corrupted. I needed a new install. Which brought me to the problem that I couldn’t find the original installation discs. No, said Asus, you never got discs. Asus doesn’t have licensing agreements with Microsoft, so they don’t provide them with new computers. If you need such a thing, it must be prepared for you using your computer’s serial number, and sent on a thumb drive. And it costs $50. Yes, I was talking to real support with Asus, not a scammer.

The good news is I ordered my reinstall drive, and I found my portable USB hard drive in a drawer. After conjuring up some DOS xcopy commands from somewhere deep in my brain, I backed up all my data, so I wouldn’t lose anything, and life can go on while I wait for my thumb drive from Asus.

So what caused all this mayhem? I’m told it was not the storm – – that was coincidental. A storm would have caused more havoc on other electronics in the house as well. Asus suggested it just happens, or I had a computer virus, although I’m diligent about scanning for that with SpyBot and Malware Bytes. It is curious that both Window 10 computers were hit simultaneously. I may never know what happened.

Passwords. I can’t remember passwords. I can dig up DOS command switches from forever ago, but don’t ask me for my password to something. Crap.

Eek, now what? Confessions of a new Cricut Maker Owner

So this happened!

20180504_101635_Film1.jpg

I have a new Cricut!  It’s been sitting on my desk in the box for the last week — yes, an entire week.  Why?  Because I have no freakin’ idea where to start and I’m a little paralyzed.  I’m seriously questioning yet another hobby, although I can totally justify that sewing/quilting and machine cutting are somewhat related — sort of, if I really try.

I’ve sent some time this week in a Facebook Cricut group, and watching videos from Auntie Tay and Lorrie Nunemaker on YouTube — thank you both if you see this.  I’m about ready to haul this sucker out and start.  I have two small projects to start with — a street sign and a small helmet sticker for MartMan — hopefully the rest will just come to me.  You know, if you build it ….

There are some bigger projects down the road, I hope.  I feel like a new parent.

Creativity, don’t fail me now.  Putting on my brave now.

Dresden Plate Clock

What time is it?

I knocked my sewing room atomic clock off the wall the other day and damaged the display, so I decided I needed a new clock. I searched Amazon, Etsy, and eBay for sewing-themed clocks and decor and found a lot of cute things, but nothing that spoke to me enough to buy. In my search, I ran across a few pictures of a handmade clock using a vintage quilt block design called the Dresden Plate, and I fell in love with it. The original purpose of a Dresden Plate quilt was to use the smallest fabric scraps so nothing went to waste, and this random piecework style seemed to suit my crafting and sewing style.

This is my version of the Dresden Plate clock.

20180407_211326_Film1-1.jpg

20180414_154555_Film1-1.jpg

Traditional Dresden Plates have 16 petals, but my first Dresden Plate blades were made using a template I accidentally found online at The Crafty Quilter that yielded 12 blades per Dresden, perfect for clock making. I chose a 12″ x 12″ x 1″ square artist’s canvas to mount my clock to, and found that a 5″ tall blade created a Dresden with a final diameter of 11-1/2″ including the center circle.

Here’s what you need to make your own:

  • A 12-blade Dresden Plate — quilted to a piece of coordinating fabric at least 14″ x 14″ or bigger so it wraps around the canvas frame to be secured in place on the back.
  • Batting — I used white fleece on this, since the fabric content really didn’t matter. The fleece was almost too bulky on the corners of the frame.
  • 12″ x 12″ artist’s stretched canvas — available in the crafts section at Walmart, or any crafting store like Michael’s or Jo-Ann’s, as well as Amazon
  • Clock works kit — the kit you choose is partially determined by the depth of your stretched canvas frame. I bought the 3/4″ kit for the 1″ deep canvas. Available at Michael’s or Amazon.
  • Staple gun
  • A tube of E6000 glue or a hot glue gun
  • One piece of shim or other long flat wood, at least 12″ long

After sewing the Dresden, I applied it to the background fabric with a running top stitch, and quilted the background fabric with a simple echo outline of the petals. You can get as creative or simple as you want. I centered and stretched the finished block on the canvas, and secured it using an electric staple gun, stapling it to the back of the canvas’s frame, much like you’d reupholster a chair. Find the center of the Dresden Plate by putting a straight pin through it from the front, and mark that location on the back of the canvas. Clip a small hole where you marked the pin, put the stem through the fabric from the back and on the front, assemble the hands on the front as directed in the clock works instructions. Finish by hot gluing the back of the clock works to the shim so it is straight and won’t move, and secure the shim to the frame of the canvas with hot glue. Be sure you don’t cover up the dial adjustment or battery case on the back with the shim. My mounting was disappointingly askew on my first clock, but it will be better next time. Trim any excess fabric on the back, hang and enjoy!

20180407_223437_Film1-1.jpg

Bathroom Vanity and Medicine Cabinet Makeover #2

Goodbye 1980s.

HallBathBefore-After

HallBathMedChestBefore-After

My latest project has been freshening up my hall bathroom vanity and medicine cabinet with a good coat of paint.  My house was built in 1986, and both were showing their useful life and style ages.

I opted to do something a little more current than the dark Java Gel Stain I’d used in the kitchen and master bathroom.  All the big kids seem to be using white right now, so I picked out a nice antique white.  I used:

  • Sander, sanding block and sandpaper.
  • TSP cleaner.
  • Dutch Boy Cabinet and Trim Paint, primer and paint, tinted 011W Antique White.  This vanity didn’t even take an entire pint container.
  • Small dense roller and tray, and small paint brush.

I removed the doors and hardware, cleaned the surfaces to be painted with TSP, lightly sanded them with a hand sander, sanding block and sandpaper to remove what was left of the old poly topcoat, then I dusted them, taped all the edges off with painters tape, and started painting.  It took three coats of brushing on the detail, then rolling the entire surface.  Rolling is the only way to go and gives a flawless finish.

Once you start painting, just know the first couple of coats will look TERRIBLE and make you question life itself.  It gets better.  Be sure to allow plenty of time for this project because you should wait about 24 hours between paint coats.  I started painting on Saturday and wasn’t done until Tuesday.  I encourage you to search YouTube for detailed instructions, as there are lots of very helpful videos out there.

Have plenty nitrile gloves handy, a wipe rag, and a couple of large zip top bags.  Since cabinet and trim paint is acrylic, you won’t be rinsing out your tools between coats.  Just drop them in a sealed bag and they’ll be fine overnight.  I threw them away when I was done.

We replaced the old antiqued gold hardware with weathered nickel.  Eventually I can see the walls painted a soft gray and new flooring, but I’m totally out of the mood for more painting projects right now.

I still like the look of the medicine cabinet in java, but this is nice and clean.  See my post on our master bathroom to see how this same cabinet looks in the dark java gel stain.  Bathroom Vanity and Medicine Cabinet Makeover Project

20180324_142953_Film1-1.jpg

20180324_142905_Film1

After

In Search of the Perfect 5″ Quilting Block

A Garage Sale Treasure

20180220_193731_Film1.jpgThis isn’t a product review, the product featured is discontinued.  It’s more of a testimony of what you can do with some creativity.  A couple of years ago, I found a Fiskars® Fuse Creativity System® letterpress/die cutter at a garage sale. From what I’d read it was designed for paper crafting like cutting shapes for making cards or scrap booking, neither of which are hobbies I ever took up. MartMan was impressed with how substantial the Fuse was, so he bought it. I wasn’t sure what to do with it, so it sat in my sewing room, under my sewing table. In all the time I’d had it, all I had done with it was some embossed coaster type things for work.

20180318_184455_Film1.jpg

Corn filled neck warmers

After my recent sewing room reorganize effort, I tried to sell the Fuse on a re-sale group online. It didn’t get much interest, which brings me to my discovery. Originally I had pulled it back out to make some tags for neck wraps I’m making. But I’m not really a paper crafter and it wasn’t a particularly creative experience.

Fotor_149845264819793

I work with fabric, including quilt blocks for bags and pouches. The most time consuming part of the process is cutting all those perfect squares. If you don’t have a perfect square, you will play heck getting perfect points on the finished block and having a nice looking finished panel. I sat and looked at the Fuse wondering if there was a die available for it that would cut fabric, in particular, 5″ squares. A Google search brought me to a video from MaterialGirl338 on YouTube where she used an Accuquilt® die to cut fabric in her new Fuse.

I knew fabric cutters like the Accuquilt GO!® existed, but at $250 to $400 for the starter set, I couldn’t justify it for my hobby crafting. But the Accuquilt cuts perfect, intricate shapes just by rolling the fabric and die with the appropriate shims through the press — a press that looks a lot like a Fiskars Fuse. Accuquilt has fabric cutting dies in a variety of shapes that Fiskars never manufactured, including triangles and squares for making quilt blocks. The cutting dies also look suspiciously a lot like the Fuse dies. It occurred to me, could the Fuse be used with other manufacturer dies to cut fabric? After some more digging, the answer is a resounding YES.

So, I purchased the optional Fuse Adapter kit*, still readily available on Amazon and eBay, and the 5″ square Accuquilt GO® die. Within a few minutes, following the instructions on the info card, I was making perfect 5″ squares in a fraction of the time I’d been spending. It’s fabulous. It accommodates up to five layers of quilting weight cotton, cutting two 5″ squares on each piece of fabric in one pass.


This slideshow requires JavaScript.

20180323_224736_Film1.jpg

I looked on Craigslist, and even today I see used Fuse units for sale, usually around $50 for the base unit kit — about a third of the original price. I purchased the optional Adapter Kit for $45 new, and the Accuquilt 5″ square die for $30, new. Between the used base unit, and the new Adapter Kit and die, for about $125, I’m cranking out 5″ squares like a pro.

20180323_210321_Film1.jpgThe info card that came with the Adapter kit lists a number of different die manufacturers that the Fuse will accommodate, including Sizzix®, another very popular die cutting system.

I’m keeping the Fiskars Fuse. And oh, look at the calendar — it’s the end of March, so it’s almost garage sale season again here in Kansas City.

*Although I can’t endorse it, I have seen one YouTube video where the author is using inexpensive Lexan sheets in various thicknesses from the hardware store instead of the Fuse Adapter kit and achieving good results in her Fuse.

Hearty Slow Cooker Cabbage Soup

Hearty Cabbage Soup Banner

This cabbage soup is very hearty and more of a chili consistency, with a little bit of zip added in. I like to keep some sort of SmartPoint-friendly soup in the fridge for lunch or a quick grab-and-go food choice. It has a tiny 2 Weight Watchers(r) SmartPoints per serving, and there’s lots of ways to make it even more SmartPoint friendly.

  • Make it entirely with ground turkey.
  • Replace the spaghetti sauce with plain tomato sauce (add oregano or other seasonings for more flavor).
  • Replace the Chili Beans with a can of unseasoned beans, like pinto, more kidney or black beans.
  • Replace the can of tomatoes with green chilies with plain tomatoes (go for low sodium, since the bouillon adds a lot of sodium).
  • Add more tomato sauce, or water, if you prefer a thinner consistency.

Hearty Cabbage Soup

  • Servings: 12 to 14-1 cup servings at 2 SP each
  • Difficulty: easy
  • Print

Ingredients

  • 1/2 pound 90% lean ground beef
  • 1/2 pound 99% fat-free ground turkey breast
  • 1/2 cup chopped onion(s)
  • 1 tsp minced garlic
  • 4 beef bouillon cubes (9 pts)
  • 1 cup water
  • 1 cup thinly sliced carrot(s)
  • 1/2 head rough chopped cabbage
  • 1/2 cup chopped celery
  • 1/2 cup chopped bell pepper(s)
  • 2 cans red kidney beans, undrained
  • 1 can Dakota’s Mild Chili Beans, undrained (9 pts a can)
  • 1 can Diced Tomatoes w Green Chilies, Best Choice (4 pts a can)
  • 16 oz Prego Traditional Spaghetti Sauce (9 pts)
  • 1 tbsp Worcestershire sauce
  • 1 1⁄2 tsp ground cumin
  • 1 tsp chili powder
  • 1 tsp paprika
  • 1 tsp black pepper

Optional:  Fresh green beans; or frozen green beans, corn or other veggies.

Directions

Dissolve the bouillon cubes in 1 cup boiling water.

In a skillet on the stove, brown ground beef, ground turkey, onion and garlic.

Now start dumping everything into the slow cooker; stir to mix.  Cook on high for four hours, low for 8 hours.

In the last hour, add in frozen green beans, corn or other frozen veggies.  If using fresh green beans, add them at the start.

Sewing Room Makeover

I’m still fighting the winter blahs and have been creatively uninspired in my sewing room lately, so I decided to do something I’ve been wanting for myself for a while.

Several weeks ago, I moved my sewing room from the front of my family room, to the back.  It’s a slightly smaller space, so I did a lot of de-cluttering and organizing and am extremely happy with the outcome.  I also now have a nice sitting area in front of our lovely fireplace again in the front part of the room.

Sewing Room Makeover

The new space.  I’ve been asked about the tables — the table on the left is our old dining room table with the center leaf in place; the table in the center is two 4-cube bookshelves with an Ikea butcher block top, total cost about $150.  The wrought iron shelving is a $5 find at a garage sale.  The large 18 cube organizer is my fabric.

I’ve been wanting to make dust covers for my embroidery and sewing machines to help finish off the reorganizing. The fabric I wound up using was a hand-me-down from my friend, Anne, and worked out yardage-wise for some quick dust covers. Fitting a cover to the embroidery arm on the embroidery machine was a challenge, and I’m satisfied with the result.

I still don’t know what to do next, but I do feel like I got something done.  Hopefully, with Spring just around the corner, I’ll start feeling creative again.

20180307_084234_Film1-1.jpg

Hello Fireplace!  Maybe wine and a good book?


My inspiration to create has vanished.

WhereIsMyInspiration
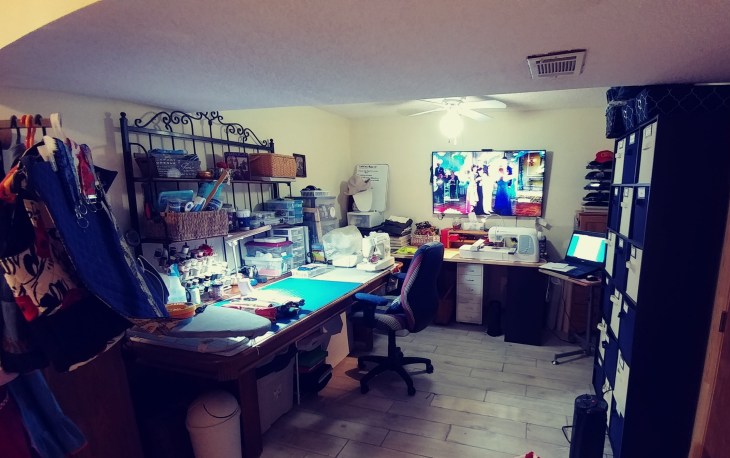
I keep going down to my sewing room and sitting in a chair staring at all I’ve accumulated to create with, and I can’t get started.  I look at Pinterest, and I save pins, but nothing is sparking “it”.  Nothing appeals to me.  I look at the stuff I have already created and all I see are flaws.  I don’t enjoy sewing clothes, because I don’t like my size, and I can’t seem to figure out what size to use in patterns.  My bags and totes don’t seem good enough to sell — everyone else’s things are perfect, their topstitching is gorgeous, their fabric is ironed flat, and their shapes are smooth and crisp, their binding is beautiful, and their seams have no buckles or puckers.  I can point out every mistake I’ve made.

I feel a little lost.

Image: Noemi, MaDe-WhIt-LoVe
Office Chair Makeover. Update your chair with new fabric.

Office Chair Makeover – No Sew Fabric Update

Office Chair Makeover. Update your chair with new fabric.

20171014_170002.jpgSecond office chair makeover, stripped screws and a trip to the hardware store

Meet my very expensive Merit chair that I’ve had for probably 20 years.  Ask any transcriptionist, our chair is our life.  We spend hours upon hours firmly planted in a chair working and if the chair doesn’t fit, your body will tell you all about it.  I love this chair, but I’m notoriously hard on my stuff, and she was showing wear.  The seat was very dirty, and probably 10 years ago I attempted a  “slipcover” of sorts and wound up with this very baggy, ugly plaid thing, making a dirty chair dirty and ugly.

20171015_165428.jpgToday I took apart her apart, and the only difference from the last makeover I did was this chair has a finished back on it, requiring fabric for both sides.  Taking the back apart required a pry bar and some gentle but firm coaxing.  Taking the screws that held the front of the backrest to the backrest support bar was a MAJOR challenge.  The screws that were originally used were machine screws and I swear they were glued in as they were screwed down.  I wound up stripping the Phillips heads while trying to take them out.  So, I also highly recommend a little device called the Grabit Damaged Screw Remover, which was easy enough that even I could work it.  A couple of new machine screws — thank you Lowe’s guy for helping me find the tool and the right screws — and the project was smooth sailing from there.

This project required:

  • Mallet
  • Pry bar
  • Pliers
  • A magnet to clean up all the staples you wind up removing (optional)
  • Phillips and flat head screw driver
  • 3/8″ staples
  • 1/4″ staples
  • Electric staple gun
  • Fabric, and fabric shears
  • Grabit Damaged Screw Remover and power drill (really optional)